Wednesday, October 29, 2008

Black Forest Cake

Black Forest cake is one of my favourite cakes. Whenever we used to go to a cake shop during my college days, I always asked for Black Forest Cake. And one day I was lazily turning the pages of a recipe book. And there I found this recipe. To my surprise it was very simple and easy to make. So I became very enthusiastic and immediately set out shopping for the items I need.

It is basically a German cake called Schwarzwälderkirschtorte, which means Black Forest Cherry Cake. It is made up of layers of chocolate cake with Kirsch, whipped cream, sour cherries and chocolate curls. It seems it was founded in late 16th century in Black Forest region of Germany soon after Chocolate was founded. This region is known for its sour cherries and Kirsch or Kirschwasser.

Ingredients:
For the cake
All-purpose flour - 21/4 cup
Sugar - 2 cups
Unsweetened cocoa powder - 3/4 cup
Baking powder - 2 t.sp
6 large  eggs
Vanilla Essence - 1 1/2 t.sp

For the Frosting & Filling
Pitted sour cherries - 1 bottle (785 gms)
Sugar - 1 cup
Cornstarch - 1/4 cup
Heavy whipping cream - 3 cups
Sugar - 3/4 cup

Method
Preheat oven to 350 degrees F (175 degrees C). Grease and flour two 9 inch, round, cake pans.
In a large bowl, combine together flour, cocoa, baking powder. Sieve together and keep aside.
Break eggs one at a time into a bowl and then transfer it into the mixing bowl.
Beat the Castor Sugar and eggs till nice creamy and fluffy.
Mix the vanilla essence.
Fold in the dry ingredients with a light hand.
Pour batter into pans.
Bake till the cake is done i.e. until a knife inserted in centers comes out clean. Takes about 20 min. Cool.

Drain cherries, reserving the juice. Keep about 1/4 cup of the reserved juice aside. Combine the rest of the reserved juice, 1 cup sugar and cornstarch in a saucepan. Cook over low heat until thickened, stirring constantly. Cool. Mix together the drained cherries.
Combine whipping cream and confectioner's sugar in a bowl. Beat with an electric mixer at high speed until stiff peaks form.
Sprinkle both the layers on the topside with 6 tbsp of the reserved juice.
Spread with 1 cup frosting; top with 3/4 cup cherry topping. Top with second cake layer. Frost top & side of cake.
And decorate the top the way you like. I filled the frosting into pastry bag fitted with star decorator tip and piped it around top of cake. And topped it with cherries.
Sprinkle with grated chocolate. Keep it in the fridge. Serve after about 3 to 4 hrs or later.

And this special treat is going to FIC : Brown hosted by Sunshinemom of Tongue Ticklers.
And to the event AFAM : Cherries hosted by Rachel of Tangerines Kitchen. AFAM was initially hosted by dear Maheswari of Beyond the Usual

Tuesday, October 28, 2008

Damrot Halwa

Damrot is a delectable Halwa which I first tasted in a marriage in my native place. It is made from Pumpkin and is very famous in South India. It is long time since I had made it. Now it is Halloween time here and we get Pumpkins in all different sizes and shapes. And my previous post Healthy Pumpkin Dosa tells the importance of Pumpkin for our health. So this is my next Pumpkin recipe.

Dumrot Halwa

Ingredients :
Finely Grated Pumpkin - 2 cups
Milk - 1 1/2 cups
Sugar - 3/4 cup
Ghee - 1/2 cup
Cardamom Powder
Nutmeg powder (Jayphal)
Dry fruits for garnishing

Method:
Grate finely the pumpkin. Take the grated cloth in a clean thin cotton cloth. And squeeze it tightly to discard the water from the grated Pumpkin.  
 
Heat ghee in a thick bottomed vessel and add the grated pumpkin.
Keep stirring till the raw smell of the Pumpkin is almost gone. Takes about 7 to 10 min. Keep the gas on medium. When it is done add milk.
Stir frequently, and when it becomes very thick i.e. the Pumpkin gets cooked will in the milk add sugar, cardamom and nutmeg powder.
Stir until the sugar is completely dissolved and the mixture reaches halwa consistency.I cooked it a little further so that the mixture leaves the sides of the vessel.
Remove from heat, add the dry fruits ( I added the dry fruits shown in the above picture.It gives a good crunchy taste). And transfer it to a greased plate. Garnish with dried fruits. Let it cool, cut into pieces and serve.
And Dumrot Halwa is going to the following events

Friday, October 24, 2008

Butterfly Award - Pass On

Happy Diwali 
Last week i was awarded "The Butterfly Award" by Malar of Kitchen Tantra. Thankyou very much Malar. This award comes with some rules.

The rules of the award are:
Put the logo on your blog. Add a link to the person who awarded you. Nominate 10 other blogs. Add links to those blogs on yours, and leave a message for your nominees on their blogs.
Since I was busy with my Diwali preparations last week I couldn't do this then.

I am very glad to pass on this award to some of my fellow blogger friends.
Kamala of Kamala's Corner

Healthy Pumpkin Dosa


The bright oranged color of pumpkin is is loaded with an important antioxidant, beta-carotene. Beta-carotene is one of the plant carotenoids converted to vitamin A in the body. In the conversion to vitamin A, beta carotene performs many important functions in overall health.
Current research indicates that a diet rich in foods containing beta-carotene may reduce the risk of developing certain types of cancer and offers protect against heart disease. Beta-carotene offers protection against other diseases as well as some degenerative aspects of aging.
Pumpkins also contain potassium, fiber, and iron. Pumpkin seed oil and pumpkin seeds are a good source of unsaturated fatty acids ("good fats"). Pumpkin seeds are very good sources of the minerals magnesium, manganese, and phosphorous, and good sources of tryptophan (an amino acid essential for growth and normal metabolism), iron, copper, zinc, and protein.
A study by the USDA indicated that diets high in pumpkin as a fiber source tend to curb the appetite, while providing high nutritional count for the calories consumed. Subjects also absorbed less fat and calories from their food.
So we saw that Pumpkin is a very healthy vegetable. But unfortunately it is not a favourite of many. My husband also does not like it. My children only like to eat pumpkins when I use them in kuzhambu. So I try to use pumpkins in such a way that they don't come to know that I have added it to the food.
One such recipe is Healthy Pumpkin Dosa.
Healthy Pumpkin Dosa 
Ingredients
Raw Rice - 2 cup
Grated Coconut - 1/4 cup
Red Chilli Powder - 1 tb.sp
Shredded Pumpkin - 4 cups
Onion - 1
Mustard Seeds - 1 t.sp (optional)
Cumin Seeds - 1 t.sp (optional)
Salt to taste
Method
Soak the rice for about 3 hours. Grind it to a smooth paste along with coconut, chilli powder & shredded pumpkin. Add salt. And keep it covered for about 5 to 6 hrs. Better over night. Heat oil in a pan. Season the mustard and cumin seeds. Add finely chopped onion & saute for a few minutes, till the onion becomes translucent.  Add this to the dosa batter.  Heat a dosa tawa, smear it with oil slightly and make dosas. Try to make thin dosas as far as possible. Serve hot with the chutney or sambhar of your choice.
This Healthy Pumpkin Dosa is going to AFAM - Pumpkins event guest hosted by Madhuram of Eggless Cooking. AFAM (A Fruit A month) was initially started by Maheswari of Beyond The Usual to appreciate the goodness of fruits.
and 

Thursday, October 23, 2008

Seepu Seedai

The Chettinad cuisine is one of South India's best known cuisines and this mouth watering cuisine has carved a niche for itself not only in Tamil Nadu but elsewhere in India and even abroad. Apart from standard and traditional food items, Chettinad cuisine is renowned for its unusual snacks and munchy items that are lip-smacking good. Some of the popular Chettinad dishes are Kandarappam, Ukkarai, Pal Paniyaram, Thenkuzhal, Karupatti Paniyaram, Kavanarisi, and Seepu Seedai to name just a few.
These are some dishes which has been an all time favourite for many people, from young to old. My grandfather who has lost almost all his teeth still likes to eat them. We give him by making it to a coarse powder in an ammi or mixie. We had mostly lived in north india, so people coming to visit us from our native place usually bring these snacks item. And almost in a jiffy it is finished.

I would like to post the recipes of some of these dishes which I make at home. Already I have posted a few of them. Today I am posting the recipe of the authentic Seepu Seedai. It is usually fried in edible coconut oil, which adds to its superb taste. It is made with rice flour, roasted gram flour. It gets it name "Seepu Seedai" because of it design. Seepu means comb in tamil. It got its design from Comb those days and hence the name. Nowadays they have designed some instruments like to achhu, kattai etc to do it easily. When I was young, we used to go to our native place - chettinadu for every summer vacation. During these days of our stay there, my grandmother, athai etc used to take our (children) help for preparing many snacks, vathal etc. Seepu Seedai always used to one of the items and we all children used to be very happy in helping them for preparing it, for 2 reasons. One because it was very interesting to do it and the next one because we will soon get our favourite snack.


Seepu Seedai

Ingredients
Raw Rice Flour - 4 cup
Urad dal Flour - 3/4 cup
Roasted Gram Flour - 3/4 cup
Diluted Coconut Milk - 2 1/2 cup
Ghee - 4 tsp
Salt to taste

Method
Basic Raw Rice Flour
Soak raw rice in water for about 2 to 3 hours. Drain the water from the rice and spread it on a clean white cloth in shade (not in sun). Let it dry for about 1 hr. Grind in a mixer. In South India we have special flour mills in many places to make wet rice flour. But then I mostly grind it in the mixer. Sieve the flour through a fine siever. Dry roast it in a low fire till it the raw smell of the rice is gone and it becomes like "sand", you should be able to draw line with it.

This is the basic rice flour for many snacks. You can prepare this rice flour before hand and keep it stored in an airtight box.

Seepu seedai
1) Mix rice flour, urad dhal flour, & ghee. Take milk from coconut by adding warm water to the same. Take about 2 ½ cups of milk, if it is not sufficient, you can add some boiling water. Boil this milk with salt, add to flour mixture & knead well . The should be soft.

2) Press in the seepu seedai achu into a long strip.
                         or
Since I didn't have a here I adopted the old fashioned way of making it with a comb. For this use a new, clean comb. Spread the dough like we do for chapatis, cookies etc in a clean greased plastic sheet. About 2 mm thick not very thin. Press it lightly with the comb, so that the lines of the comb get formed on it.

3) Cut into pieces of even length. Form it in the shape of rings using your finger. Fry for about 10 – 15 in hot oil (but not very hot) till it is done (i.e till the sound of the oil has stopped or is very little). Remove to kitchen tissue, cool & store.

Submitting this post to the JFI - Festival Treat Event guest hosted by Srivalli of Cooking 4 All Seasons. JFI was initially started by Indira Of Mahanandi

and
To the event Festive Food : Diwali hosted by Priti of Indian Khana


Tuesday, October 21, 2008

An Award & A Nephew

Yesterday was a very happy day for me. There were two good news.
First one : I was given "The Butterfly Award" award by Malar Gandhi of Kitchen Tantra. I was very excited about it from yesterday morning. Thank you very much Malar for the Award.

Second One : My brother called me tell me that I have become an Athai for a baby boy. And this one doubled up my joy. Waiting very eagerly to go to India to see my new born Nephew.
So both these news kept me very busy whole day in the kitchen making sweets.

Monday, October 20, 2008

Uppu Seedai - Oval Shaped

Seedai is a special South Indian Savory. Seedai is a small ball shaped snack made with rice flour and deep fried in oil. It is made for many different occasions like Krishnajayanti, Diwali etc. And is available in many shops in Tamilnadu. It is normally ball shaped but the ones we make are a little oval shaped. And my elders often say the size of seedai often matters the taste.

There are different methods to make seedai. This one is our traditional way, easy and tasty way of making seedai and needs less ingredients.

Uppu Seedai
Ingredients
Boiled Rice - 4 cups
Roasted Gram Flour - 1 1/4 cup
Coconut Milk - 2 cups
Butter/Ghee - 1 t.sp
Salt to taste (about 4 t.sp)
Method
Soak the rice for 1 to 2 hrs. Drain of the water & grind it in the grinder.. While grinding use the coconut milk first instead of water. And then later on add water if required.  Grind it to a smooth & fine paste. Remove it from the grinder and add sieved roasted gram flour to it. Add warm melted butter/ghee & salt to the mixture.Knead it to form a soft dough. There is quite bit of water in the dough at this stage. So spread out the dough in a clean, thick cotton cloth and keep it covered for sometime till the cloth sucks in the water from the dough. The resulting dough should be a smooth dough without much of water.

Now relax a little bit. If you have children or if your hubby dear is at home, you can take their help a little bit. :). Take a tiny portion of the dough and roll it into small balls with your palm & finger. Then slightly press it to get oval shaped seedai. Place all the seedais on a clean cloth or maybe some thick paper. As far as possible do not put them one above other.

Now you are ready for frying. Heat oil in a pan. The oil should be at the right heat not too hot. Fry the seedais in small batches till they are slight pink. When the sound of the frying stops remove them. Do not over fry them.

Crispy & Tasty seedais are ready. Keep them in a air-tight box.

Note :
It may happen that you Diwali in your kitchen while making seedais. So please keep a lid ready near you. Stand a little far away from the oil. If it starts spluttering close it with the lid, put of the stove. I think it happens because of trapped water molecules in the dough. That is why try to remove them as far as possible before making the dough into seedais.
Though this is a safe method since I have used coconut milk instead of grated coconut, but still being careful is always better.

This is post is going to the JFI - Festival Treat Event guest hosted by Srivalli of Cooking 4 All Seasons. JFI was initially started by Indira Of Mahanandi

and
To the event Festive Food : Diwali hosted by Priti of Indian Khana

Tuesday, October 14, 2008

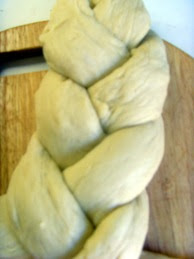
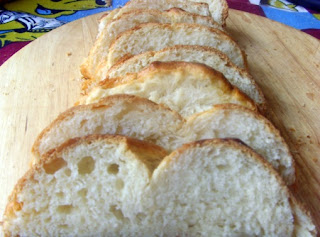
Hefezopf - Yeast Braid

Hefezopf (In German) is a soft spongy bread. We get it here in almost all the bakery and supermarkets. There are many versions of it like they come stuffed with nuts or have nuts, poppy seeds etc strewn on them. Whenever I see them in the shops I always wanted to try them at home. One day I saw a recipe of its simpler normal version in a german magazine. With the toota-foota german I know, I read it & tried it out. It came out real superb. Infact much better & soft & spongy than the shop-brought ones. I am not a baker very often. Just sometimes I keep trying something. I bake biscuits very often. Cakes & breads very rarely.

So anyone new to the baking field also can try it out. It does not need much of baking knowledge & requires very minimum ingredients.

Here is the recipe for the Hefezopf (Yeast Braid)
Ingredients
All purpose flour - 450 gm
Fresh Yeast - 42 gm
Lukewarm Milk - 150 ml
Sugar - 75 gm
Butter - 100 gm (at room temperature)
Egg - 1 (at room temperature)
Salt a pinch.

For coating
Egg yellow - 1
Milk - 1 tb.sp

Method
1. Take the flour in a big bowl & make a well in the center. Add the yeast crumbles,50 ml of the warm milk & 1 tb.sp Sugar to the flour. Add some flour on the top of this mixture.

2. Close the bowl and leave it undisturbed for about 20 minutes. 

3. Add the butter, egg, rest of the milk, pinch of salt & rest of the sugar to the yeast-flour mixture. Add knead into a smooth dough. Keep the dough covered in a warm place for about 15 min.

4. The dough becomes almost double than before. Knead it slightly once again & you get a soft & fluffy dough.

5. Spread some flour on the working area & make 3 portions of the dough. Roll the 3 portions to 50 cm long strands. Preheat the oven to 175 F.

6. Using the 3 strands form the braids. Place it on a backing tray lined with a backing sheet. Cover it with a clean cloth and wait for 15 min.

7. Mix together the egg yellow & the milk in a bowl. Brush the Braid with this mixture. And bake it for about 30 min at 175 F.


Sending this post to the event 3rd World Bread Day hosted by Zorra of 1x umrühren bitte

Monday, October 13, 2008

Brussels Sprouts Curry

Brussel Sprouts are very important nutritionally since they are one of the top providers of vitamin C, They provide Vitamin C more than twice as much as the same weight of orange.

So let us see what are Brussel Sprouts. I have been cooking it for a long time but came to know its name in English and its nutritional value now only when I googled for it. They belong to the cabbage family and can be called a miniature version of a cabbage. It is much same like the kalakkos (in Tamil) which we get in supermarkets in Chennai. I do not know about its availability in other cities
 
They contain good amounts of Vitamin A, Vitamin C, Folic Acid and dietary Fibre. Moreover, they are believed to protect against cancer. Not only this but they have been proven to be a valuable aid in curing diabetics.

In Germany they are available through out the year in Frozen Food Section. But I usually prefer the fresh ones which comes only during the season. We all like it.

Here goes the recipe of Brussels Sprouts Curry
Ingredients
Brussels Sprouts - 1/2 Kg
Onion - 1 Big (chopped)
Tomato - 2 medium sized (chopped)
Salt to taste
Chilli Powder - 1 1/2 t.sp
( I used homemade curry powder - 1 tb.sp (gives a little thickness to the curry))
Oil - 1 Tb.sp
Mustard Seeds - 1 t.sp
Urad Dal - 1 t.sp

Method
Try to choose as far as possible small & thick Brussels Sprouts. Wash & halve them lengthwise. Heat oil in a pan & when the oil is hot add the mustard seeds & urad dal allow it to pop. Add the onions & tomatoes. When the tomatoes are cooked add the halved Brussels Sprouts and cook covered on medium for about a minute or two. Add the chili (curry) powder & salt. Mix it a little & cook covered till it is done. Stirring in between. Do not over-cook it. Let it be little bit crunchy.

Serve as a side dish for rice or chapathi.

And this post is going to the contest Eat Healthy - Fight Diabetes hosted by Sangeeth of Art of Cooking Indian Food

Sunday, October 12, 2008

Sprouted Moong Salad

Sprouted Green Gram/Moong Salad/Sundal is a protein rich, refreshing and healthy salad. Dal when sprouted turn out to be sweeter and this combo goes well with cucumbers, lemon and green chili. Good for people of all ages and also for people who want to be on diet & for diabetics also.
Sprouted Moong Salad

Ingredients
Sprouted Moong - 2 cups
Tomatoes - 2 chopped
Carrot - 1/2 cup grated
Onion - 1 chopped
Green chilli - 1 chopped
lemon juice - 2 t.sp
Cucumber - 1 small (washed & chopped)
coriander for garnishing
salt to taste

Method
For moong sprouts
Wash the moong and soak in water for about 6 to 8 hrs. Drain the water and put the soaked moong in a bowl or in a colander. Keep it covered. Leave it for about a day.

Once the moongs are sprouted, you can also use them raw for the salad. It is more healthier. But then we like it a little soft, so I steam the sprouts for some time. My mother used to use the raw sprouts as such.


Heat 1 t.sp oil in a pan, add onion. Once the onions are translucent add the green chilies, carrots and tomatoes. And cook for about a minute. Remove the pan from fire add salt, lemon juice, cucumber and the sprouted moong. Serve cold or warm.

Submitting this to the contest Eat Healthy - Fight Diabetes hosted by Sangeeth of Art of Cooking Indian Food

Tuesday, October 7, 2008

Saucy Soya Manchurian

Soya is good for health in many ways. It improves bone health, relieves menopausal symptoms, reduces risk of heart diseases, prevents cancer and above is very nutritive, full of rich proteins.
Moreover my children like soya chunks more than any other soya product. And so I made this Saucy Soya Manchurian for them.
Saucy Soya Manchurian
Ingredients
Soya chunks - 100 gm
For Marinating Soya Chunks
Gram Flour - 1/4 cup
Maida - 1/4 cup
Cornflour - 1/4 cup
Red Chili powder - 1/2 t.sp
Soya Sauce - 1 t.sp
Chili sauce - 1 t.sp
Tomato sauce - 1 t.sp
Salt to taste
For the Sauce
Big Onion -  1/2 cup (finely chopped)
Garlic pods - 5 (finely chopped)
Capsicum - 1 (optional)
Cornflour - 2 t.sp
Red Chili powder - 1/2 t.sp
Salt to taste
Soya Sauce - 1 t.sp
Tomato Sauce - 2 t.sp
Spring onions green for garnishing

Method
Cook the soya chunks in salted boiling water for about 5 min. Drain the water and let it cool. Squeeze the chunks and repeat the above process about 2 - 3 times.
Add all the ingredients given for marinating & marinate the squeezed soya chunks for about 1/2 hr. Add water only if needed. In the meantime chop the capsicum, onions & garlic finely. Heat oil in a pan for frying the marinated soya chunks. Fry the soya chunks till they are golden brown in colour. Heat another pan with 1 tb.sp oil. Add the chopped onions, garlic. Saute for 2 min. Add the capsicums and saute. Add the red chilli powder and all the sauces. And salt. Add little water and let the gravy boil for about 1 min. Now add the cornflour mixed in 1 tb.sp water to the gravy. Allow the sauce to thicken. In the end add the fried soya chunks. Garnish with Spring Onions & serve.

It can be taken as it is or as a side dish for chappathis, parathas etc.

And this post is going to the event FIC : Brown hosted by Sunshinemom of Tongue Ticklers.

Monday, October 6, 2008

Whole Grain Foods

Since Whole grain foods have been proven to be good for fighting diabetes I am re-posting my earlier posts
Instant Bulgur Rava Idli


Nutrition Powered Oats Dosa has been prepared using oats and cornmeal


Cucumber has also been proven good for fighting diabetes since it contains a hormone needed by the cells of the pancreas for producing insulin. So re-posting my previous post.
Sour Cream Cucumber Salad


Gooseberry contains chromium. It has a therapeutic value in diabetics. Indian Gooseberry or Amla stimulate the isolated group of cells that secrete the hormone insulin. Thus it reduces blood sugar in diabetic patient. Just now read this in Illatharasi's roundup of AFAM - Gooseberry. So reposting my previous post 
Refreshing Gooseberry Squash

This post of course contains sugar in the original recipe. But then I have mentioned at the end of the post an alternative for the diabetic patients also.


These posts are my entries for the contest Eat Healthy - Fight Diabetes hosted by Sangeeth of Art of Cooking Indian Food

Friday, October 3, 2008

Eggless - Vegetarian's Omelet

This is purattaasi (tamil) month & using eggs are banned for us. My mother used to make omelets without using eggs. So I called her & got the recipe. And I tried it & it was soft, spongy & very nice. As easy as we make our relugar egg omelets.


No Egg - Vegetarian's Omelet
Ingredients
Gram flour - 1 cup
Wheat flour - 1/2 cup
Sour Curd - 1 tb.sp
Grated Carrot - 1/4 cup
Red Chili powder - 1/2 t.sp
Salt to taste.

Method
Mix all the ingredients in a bowl. Add water as required so that the mixture is of relugar omelet consistency. Heat a non-stick pan, brush some oil & spread the mixture. Cook on both the sides. Serve hot with any chutney or dips or with idli milagaipodi.

So it is fast & quick. Very filling also.
This is going to 101 Omelet Series hosted by Sangeeth of Art of Cooking Indian food.

Homemade Tomato Sauce

Many of us like Tomato sauce as a dip for many different dishes and also as an ingredient in some of the dishes. And mostly it is readymade brought from stores sauce. So I used to make Tomato sauce at home, when I used to get Tomatoes for a little cost in India. But after coming to Germany I had not made it for a long time, since I had left the recipe back at my home in India. Some days back I incidentally landed on Experiments in Kailas Kitchen & there I saw a recipe for Tomato Sauce. And I made it with slight variations to suit our taste. I was very good & easy to make.


Homemade Tomato Sauce 
Ingredients
Tomato juice - 10 cups 
Requires about 2 kgs of juicy tomatoes. 
Sugar - 1 cup
Vinegar - 1/2 cup
salt to taste
Red Chilli  -  1 t.sp

To be tied in a cheese cloth
Garlic - 2 pods
Onion - 1 medium
Jeera - 1 tspn
Cardamom - 5 nos
Cloves - 3 nos
Pepper powder - 1/4 tsp
Cinnammon - 1 inch pc
Nutmeg powder- 1/2 tspn
Peel the tomatoes. Easiest way for doing this put the tomatoes in hot boiling water & let it boil for about a minute. Remove the tomatoes from the water & immediately show them under the tap in cold running water. Make puree of it and strain. You can also wash and puree the tomatoes directly and strain.

Powder the spices. Mix it to chopped garlic and onion. Tie this mixture in a cheese cloth.

Take the juice with 3/4 cup of the sugar. Add the red chili powder. Dip the cloth pouch in to the juice and cook till you can smell the aroma of spices.
This will take around 20 minutes. Just stir 2/3 times in between. By this time, the syrup will start thickening. Remove the tied pouch.

Add salt, vinegar and the remaining 1/4 cup of sugar. Boil the mixture, till it reduces to 1/3 of the original quantity. Cool and fill it in clean, sterilized bottle & refrigerate.
This is my entry for the event MBP : Tantalizing Sauces guest hosted by Rachel of Tangerine's Kitchen, started by Coffee of The Spice Cafe

Sheermal

Sheermal or Shirmal is a saffron-flavored slightly sweet traditional leavened flatbread that is found in various countries on the Asian sub...